
- in Production by Bobby Owsinski
A Tech Guide To Livestreaming
Livestreaming has been the big buzzword over the last year as it’s the only way for creators to safely get their wares out in front of the public. That said, there’s a bit more to it than signing on to Facebook, YouTube, or Instagram (pick your platform). If you want your stream to look and sound professional, you need some additional tools. Luckily most aren’t too expensive, and some you probably already have. Let’s dive in.
Audio Signal Path
Sure you can do a livestream from your phone and it might even sound surprisingly good, but chances are that you want something a bit more controlled. That means the normal miking setup for vocals and instruments that you would use for recording.
While we could dive deep into this section alone, suffice it to say that the whole key to how you sound is your computer audio interface. This is one place I wouldn’t skimp, because it makes a difference that’s noticeable, both from the analog input side and the analog and digital convertors.
My normal audio setup is now very simple. It’s a Shure SM7B microphone into a Rupert Neve Designs Shelford Channel into a UAD Apollo Twin II. This is more expensive than the norm but you can definitely hear the difference. I’ve had lots of remarks about how good it sounds (especially from pro podcasters and streamers) but it’s really no secret. Good gear + good setup = good sound. We’ll go more into the particulars in an upcoming post.
Video Signal Path
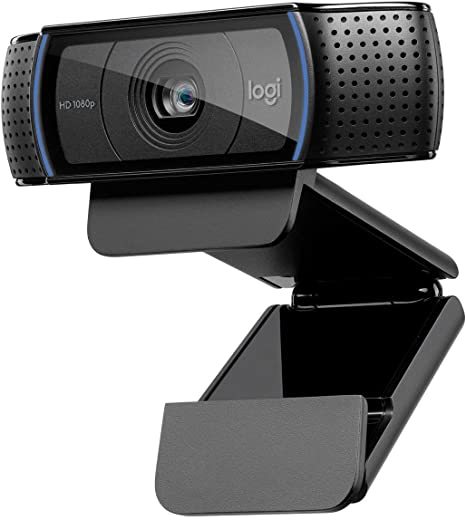
While the camera in your computer might suffice, the problem is that it’s probably still a relatively low resolution one at 720P. Full hi-def 1080P and even 4k upgrades are so cheap these days, that you can get a nice dedicated Logitech camera for between $50 and $200. The ease of setup and difference in clarity is worth it.
If you happen to have a video camera around (who doesn’t), you can also use that as either your main or a secondary camera (more on that in a minute). I use a Canon XC 15, although I have to admit that sometimes I just revert to the computer camera for something fast, since the outboard camera takes a bit of time to set up.
Lighting
Probably the most overlooked piece of the puzzle is lighting. If you look dark, you look uninteresting. The good thing is that lighting is cheap and easy to find these days.
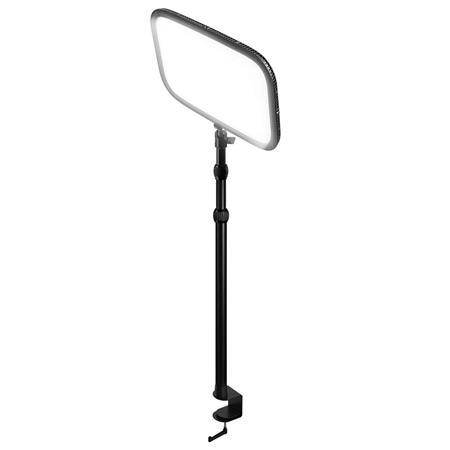
Instead of setting up a big lighting rig with lot of stands that take up room and get in the way, desktop lighting has truly come of age. I use the Elgato Key Light that comes with a stand that clamps onto your desk. You can get cheaper Dazzne versions on Amazon, but the clamp stand isn’t as good and doesn’t go as high as the Elgato does. And you can control its brightness and color with a phone app. My second light (you should have at least 2) is a Newer NL 660 on a stand that’s clamped onto the left side of my desk. I use my overhead desk lights as a rim/background light if needed.
Software
All social platforms now have a separate livestreaming section that allows you to control your stream, but that’s not the most efficient way to do it. A couple of nice 3rd party apps help you do the job a lot better.
The first is Streamyard, which allows you to broadcast to multiple platforms at once. You can also have up to 10 guests, insert graphics, see you post comments, and schedule livestreams. It’s free for the lite version, but you open up the possibilities when you pay the $25 per month subscription. I used this a lot when I first started and like it a lot. It’s fast and easy to use.
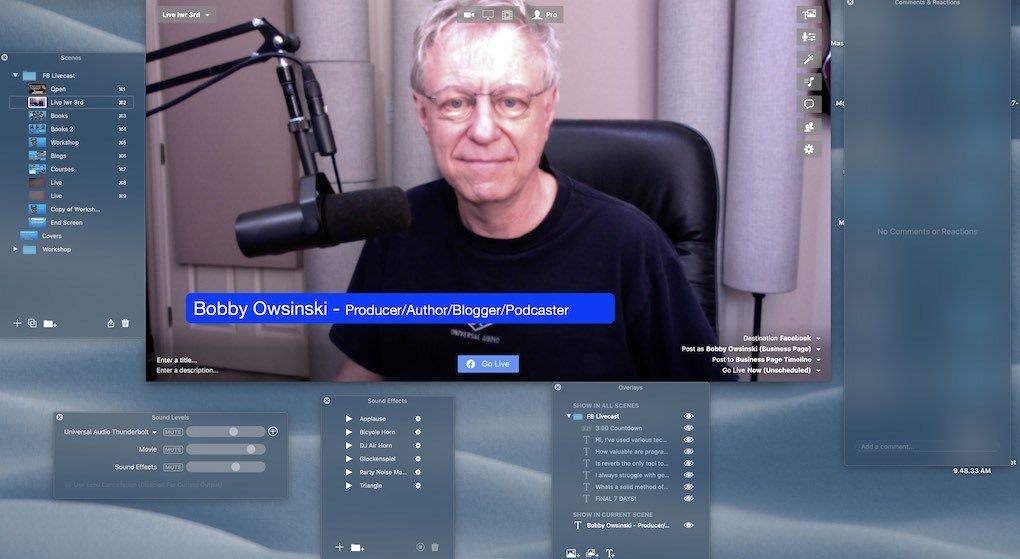
What I use now is Ecamm Live (see the graphic above), which is the same price, but way more sophisticated. You can program different scenes with different graphics, insert videos and sound effects, switch between multiple cameras and guests, and lots more. It doesn’t stream to multiple platforms at the same time natively though, so you have to use Restream for that.
By the way, none of these 3rd party livestreaming apps stream to Instagram. The platform has a closed API, so the best way to stream there simultaneously with your other streams is to put up a phone and just do it guerrilla-style.
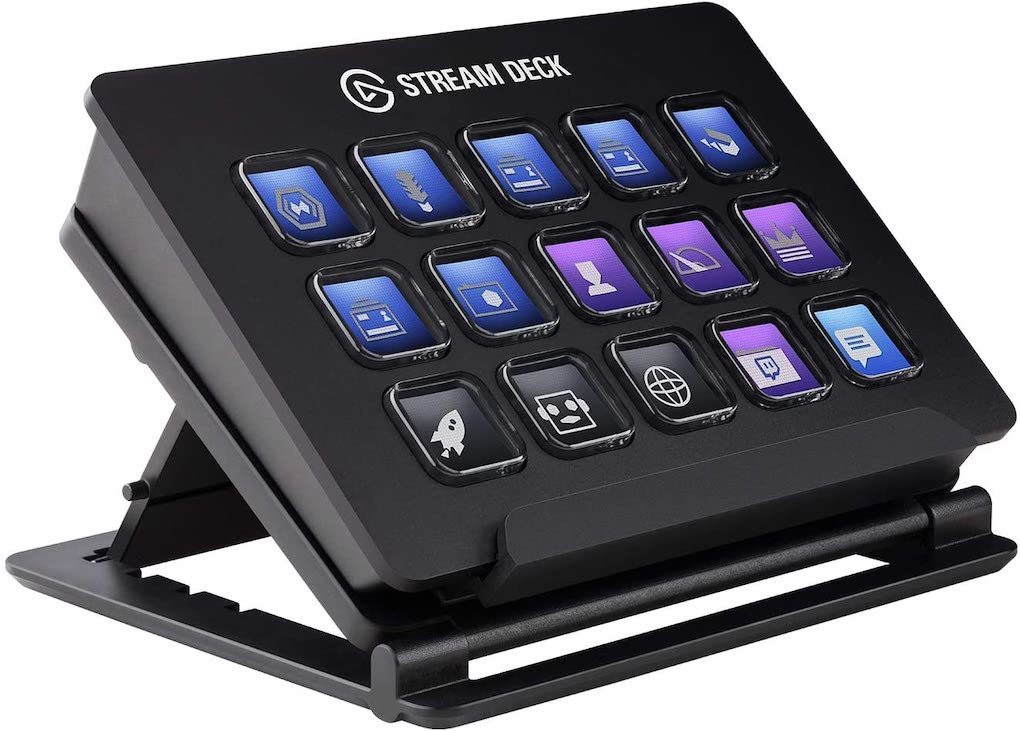
You can do so much with Ecamm but it requires a lot of mousing around the screen, which can be distracting if you’re also the on-screen talent. What I’ve found helps a lot is a box called Stream Deck, which is a series of assignable buttons so that you can do instant switching without resorting to a mouse. I liked it so much for this purpose that I now use it with Final Cut, Pro Tools, and even Pages when I’m writing. It really speeds the process up.
Promotion
If you take one thing from this post, let it be this. You have to promote any livestreaming that you do ahead of time to get any viewers. That means scheduling it at least 4 days ahead of time and announcing that it’s happening (this happens automatically with Streamyard and Ecamm) at that time, then following up to your mailing list and social platforms 2 days before, the day before and the day of the event.
A-list celebs have found themselves with fewer than 30 people watching when going live unannounced, so if they can’t make it work, neither can you. Promote that livestream and you’ll find the audience that you’re looking for. Follow the tips above and they’ll love your livestreaming even more!
