
- in Production by Bobby Owsinski
3 Miking Techniques For Upright Piano
With the piano samples available in the typical electronic keyboard these days, there’s little need to try to mike the nearest available piano for most projects, especially in a home studio. That said, there’s nothing like the live feel of a recorded instrument. Most small studios aren’t blessed with a grand piano, but an upright is more likely to be available. The trouble is, it can be a lot more difficult to get a great sound from an upright piano. Here are a few miking techniques culled from the 4th edition my Recording Engineer’s Handbook that are a good place to start.
Although there are numerous ways to mike an upright piano, none of them are particularly ideal. The way that sounds the best (Technique #2 below), frequently suffers from stool and foot noise from the player.
The Techniques
Technique #1: Place an ORTF or X/Y stereo pair about 3 feet away from the back soundboard. This method will provide a nice wide stereo field, but will be lacking in high end and note definition.
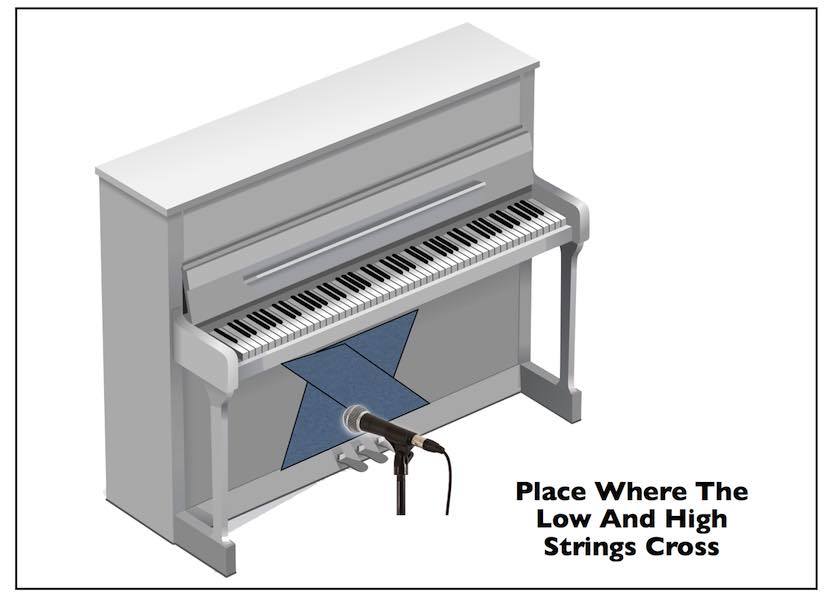
Technique #2: Take the panel off that sits in front of the strings underneath the keyboard. Place a microphone set to omni about 12 inches away from the point where the low and high strings cross (see the image on the left).
- Variation: Add a second mic right above the separation, pointed toward the high keys.
Technique #3: Open up the top of the piano and place a mic on the bass side and another on the treble side facing down, just over the lip of the piano. This is the technique that most people use but can sound somewhat boxy if the mikes are actually placed inside the top housing. Best to place them just outside pointing towards the strings.
As stated above, Technique #2 usually sounds the best but depends upon the discipline of the player, since it will also pick up seat and pedal noises during the performance.
You can read more from The Recording Engineer’s Handbook and my other books on the excerpt section of bobbyowsinski.com.
